

Table of Contents
- Is Installing a Leveling Kit Difficult? What You Need to Know
- Leveling Kit Installation Tools You'll Actually Need
- DIY Leveling Kit Installation: Step-by-Step
- How Long Does Leveling Kit Installation Take?
- Do You Need an Alignment After a Leveling Kit?
- Leveling Kit vs. Full Suspension Lift: Installation Differences
- Common Installation Mistakes and How to Avoid Them
- When to Call a Professional
- Frequently Asked Questions
Last Updated: October 8, 2026
Is Installing a Leveling Kit Difficult? What You Need to Know
Installing a leveling kit is achievable for most DIY truck owners, but difficulty depends on your mechanical skill, the kit type, and your truck's design. A leveling kit installation can range from straightforward to moderately challenging.

The difference between a smooth install and a frustrating one usually comes down to preparation, the right tools, and understanding what your specific truck requires.
A leveling kit installation lifts your truck's front end to match the rear, creating a level stance and better approach angles. It's less invasive than a full lift, but "less invasive" doesn't mean simple.
Here's what a leveling kit installation actually involves, what tools you genuinely need, and when to hand the job to a professional.
Leveling Kit Installation Tools You'll Actually Need
Most leveling kit guides hand you a generic tool list and move on. The honest answer: for a basic top-of-strut spacer kit, you probably have what you need. For a full strut replacement, you'll need one or two specialty items.
Must-Have Tools (You Cannot Do This Job Without These)
- 3/8" and 1/2" drive socket set, metric and standard, most trucks use a mix. Metric covers most late-model domestic and import trucks; standard still shows up on older models and some aftermarket hardware.
- Torque wrench rated to at least 150 ft-lbs, suspension fasteners are torque-critical. Guessing here is how ball joints and control arms fail.
- Breaker bar or long-handle ratchet, factory suspension bolts are often torqued well past 100 ft-lbs and will laugh at a standard ratchet.
- Hydraulic floor jack rated for at least 3 tons, plus jack stands rated for your truck's curb weight with headroom.
- Wheel chocks, four of them. Not two.
- Lug wrench or impact wrench sized for your lug nuts.
- Penetrating oil (PB Blaster, Kroil, or similar), apply the night before if you can.
- Pry bar, you'll need it to persuade components apart, not to force them together.
- Work light, suspension work happens in shadow.
Nice-to-Have Tools (They Save Hours, Not Required)
- Impact driver or 1/2" impact wrench, turns a 20-minute bolt removal into a 30-second one. A breaker bar and patience work fine if you don't own one.
- Spring compressor, only required for strut spacer kits where you disassemble the strut assembly. Many top-of-strut spacer kits do not require this. Check your kit's instructions first.
- Creeper, saves your back on a long install.
- Torque angle gauge, only relevant if your kit specifies torque-to-yield fasteners.
- Ratcheting combination wrenches, nice in tight wheel-well spaces.
Budget Alternatives That Actually Work
- Spring compressor: Auto parts stores loan these through their tool loaner programs, pay a refundable deposit, use the tool, return it. The single biggest money-saver on a strut spacer install.
- Impact wrench: A breaker bar with a cheater pipe handles every bolt on a leveling kit. Slower, not impossible.
- Torque wrench: Do not substitute this. A beam-style torque wrench is inexpensive and accurate enough for suspension work.
- Jack stands: Borrow or buy. Never substitute cinder blocks, ramps, or a second jack.
Tools You Do NOT Need (Despite What Forums Say)
- Alignment rack access, you need an alignment after the install, but you don't need to perform it yourself.
- Welder or cutting tools, a bolt-on leveling kit does not require fabrication. If a guide tells you to cut or weld, you're reading about a custom lift.
- Coil spring compressor for top-of-strut spacers, many kits install the spacer above the assembled strut without disassembly. Confirm in your kit's instructions.
Truck Army Tech Tip
Before you buy a kit, download the installation PDF from the manufacturer's site and read the tool list on page one. Some kits list a specific socket size or a specialty bit (like a 12-point 14mm for certain strut-to-knuckle bolts) that isn't in a standard set. Knowing that before you start beats a mid-install trip to the parts store.
DIY Leveling Kit Installation: Step-by-Step
Before You Start: Safety and Preparation
Safety is non-negotiable. One mistake with jacking or support can cause serious injury.
Pre-installation checklist:
- Park on level, solid ground (concrete is ideal)
- Engage the parking brake
- Place wheel chocks behind all four wheels
- Gather all tools before starting
- Read the kit instructions completely
- Identify all fasteners and components beforehand
- Check torque specifications for your specific truck model
Know your truck's specs: Different years, trims, and bed lengths have different suspension geometry. Check your owner's manual and the kit documentation for your exact configuration.
Jacking safely: Use a hydraulic floor jack, never a bottle jack or scissor jack. Place jack stands rated for your truck's weight under the frame. The jack lifts the truck; the stands prevent it from falling if the jack fails.
Installation Process
Step 1: Raise and support the truck
Lift the front end with the jack under the frame, not the suspension components. Place jack stands securely and lower the truck onto them.
Step 2: Locate and remove existing components
Identify the struts, springs, or other components the kit replaces or modifies. Take photos before disassembly to help during reassembly.
Step 3: Install new components
Follow the kit's instructions precisely, some kits add spacers on top of the strut, others replace components entirely.
Step 4: Torque fasteners to specification
Use the torque wrench. Tighten in a star pattern if there are multiple bolts on one component, and work gradually.
Step 5: Reinstall wheels and lower the truck
Put wheels back on and tighten lug nuts by hand first.
Step 6: Check everything
How Long Does Leveling Kit Installation Take?
Time varies based on your experience and the kit type.
Typical timelines:
- Bolt-on spacer kits: 2-4 hours
- Strut replacement kits: 4-6 hours
- First-time DIY: add 2-3 hours for learning
- Professional installation: 1-2 hours
If you've never done suspension work, plan for the longer estimate, time spent understanding the kit and double-checking your work is safety, not waste. A simple spacer that bolts on top of your existing strut is quicker than removing the entire strut assembly. Check your kit's documentation for realistic expectations.
Do You Need an Alignment After a Leveling Kit?
Yes. A leveling kit installation changes your suspension geometry, which affects wheel alignment. Lifting the front alters caster angle (the forward tilt of the steering axis), camber angle (the vertical tilt of the wheel), and toe-in (the angle of the wheels relative to center). These changes affect how your truck handles, how tires wear, and how the steering feels.
What happens without alignment:
- Uneven tire wear (often faster on the inside or outside edges)
- Pulling to one side while driving
- Steering wheel not centered
- Reduced tire life
- Possible handling issues
Many truck owners get it done within a week of installing a leveling kit.
Leveling Kit vs. Full Suspension Lift: Installation Differences
A leveling kit installation is simpler than a full suspension lift, but understanding the difference helps you choose the right upgrade.

- Raise only the front end (typically 1-2.5 inches)
- Use spacers or strut replacements
- Preserve factory ride quality
- Require alignment after installation
- Take 2-6 hours for DIY installation
Full suspension lifts:
- Raise front and rear (typically 3-6 inches)
- Replace springs, shocks, and often control arms
- Alter ride quality (stiffer, more responsive)
- More complex installation (8+ hours DIY)
- More expensive parts and labor
- More dramatic impact on handling and clearance
A leveling kit is often the better choice for a level stance without major suspension changes. A full lift is better for an off-road build or significant clearance for large tires.
Installation complexity comparison:
| Aspect | Leveling Kit | Full Lift |
|---|---|---|
| Time (DIY) | 2-6 hours | 8-12 hours |
| Tools needed | Basic socket set | Specialized tools |
| Alignment required | Yes | Yes |
| Difficulty | Moderate | Advanced |
| Cost range | $250-$600 | $800-$2,500 |
A leveling kit is a smart entry point into suspension modification. If you're comfortable with basic mechanical work, a leveling kit installation is achievable. A full lift demands more skill and patience.
Common Installation Mistakes and How to Avoid Them
Mistake 1: Not reading instructions completely
Many kits include details specific to your truck's year and model.
Mistake 2: Forgetting to torque fasteners properly
Under-tightened bolts loosen over time; over-tightened bolts strip threads or break. Fix: Use a torque wrench every time and check the kit documentation for exact specifications.
Mistake 3: Skipping alignment
Some owners install the kit and assume the truck drives fine, but alignment issues show up gradually as tires wear unevenly. Fix: Schedule alignment within a week of installation.
Mistake 4: Not using jack stands
A truck supported only by a jack is dangerous. Fix: Always use properly rated jack stands under the frame, not suspension components.
Mistake 5: Mixing fasteners
Suspension bolts aren't all the same, and using the wrong fastener in the wrong location causes failures.
Mistake 6: Forcing components
If a bolt doesn't thread smoothly or a component doesn't fit, something's wrong.
When to Call a Professional
A leveling kit installation is DIY-friendly, but some situations favor professional help.
Call a shop if:
- You don't have a safe place to work (a level, solid surface with good lighting)
- You lack basic mechanical tools or experience
- Your truck has electronic suspension or other complex systems
- You're uncomfortable working under a lifted vehicle
- You want warranty coverage on the work
- You need alignment done immediately after installation
Professional installation typically takes 1-2 hours. For many truck owners, that's worth the peace of mind, you get the upgrade without the risk, and the shop handles alignment.
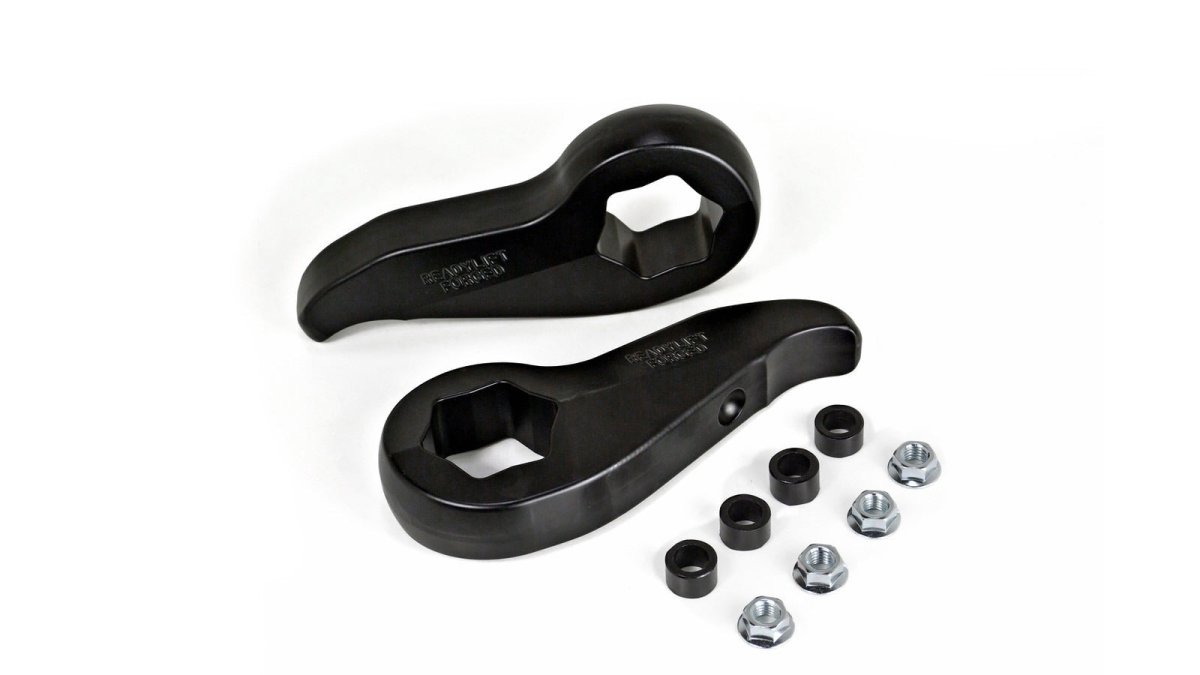
Truck Army offers a selection of quality leveling kits designed for straightforward installation. Our READYLIFT leveling kits are engineered for bolt-on simplicity and come with detailed instructions for your specific truck model. Whether you're tackling this yourself or having a shop handle it, choosing the right kit makes all the difference.

Frequently Asked Questions
How difficult is it to install a truck leveling kit?
Difficulty depends on your mechanical experience and the kit type. Bolt-on leveling kits are accessible for DIYers with basic tool knowledge and can take 2-4 hours. Strut spacer kits require more suspension work and may demand more skill. If you're comfortable with basic automotive maintenance, a leveling kit is manageable. First-timers should budget extra time and have a friend help. Kits like the READYLIFT Leveling Kit are designed for straightforward installation, but always review your specific kit's manual first.
What tools do I need to install a leveling kit?
Essential tools include a socket set, torque wrench, jack and jack stands, lug wrench, and possibly a spring compressor depending on your kit type. A torque wrench is critical, improper fastener tension causes misalignment and suspension issues. Some kits require strut spacer removal, which may need a spring compressor. Review your kit instructions to confirm exact requirements before starting.
Do I need an alignment after installing a leveling kit?
Yes, an alignment is strongly recommended after leveling kit installation. Even small changes to suspension geometry affect wheel alignment and handling characteristics. Improper alignment causes uneven tire wear, pulls to one side, and reduced off-road performance. Professional alignment ensures your suspension is set to factory specifications or adjusted for your specific modifications. Professional alignment protects your tires and ride quality long-term.
How long does it take to install a leveling kit?
Most bolt-on leveling kits take 2-4 hours for an experienced DIYer. First-timers should plan 4-6 hours, especially if you're unfamiliar with your truck's suspension system. Strut spacer kits may take longer due to spring removal and reassembly. Factors like rust, tight fasteners, and working space affect timing. After installation, add another 1-2 hours for a post-installation inspection and torque verification. Professional shops typically complete the job in 2-3 hours.
A leveling kit installation is within reach for most truck owners with basic mechanical skill and the right tools. The real key is preparation, patience, and following instructions precisely. Whether you're doing it yourself or hiring a professional, the investment in a quality kit and proper installation pays off in improved stance, better ground clearance, and a truck that looks and handles the way you want it to.