

Table of Contents
- Why Post-Trail Suspension Maintenance Matters
- Post-Trail Cleaning and Undercarriage Washing
- Off-Road Suspension Inspection: What to Check
- How to Lubricate Truck Suspension Components
- Truck Suspension Damage Symptoms and When to Stop Driving
- Off-Road Truck Maintenance Checklist and Inspection Intervals
- Retorquing Suspension Fasteners Safely
- Truck Army Tech Tip
- Frequently Asked Questions
Last Updated: October 6, 2026
Why Post-Trail Suspension Maintenance Matters
Understanding how to maintain truck suspension after off roading starts with recognizing that off-roading stresses every part of your suspension.
It's also about safety. A worn bushing or loose bolt affects handling and control, and mud packed into suspension joints traps moisture that corrodes metal and accelerates wear.
Learning how to maintain truck suspension after off roading means treating post-trail maintenance as mandatory. A quick inspection and cleaning reveals problems before they become expensive repairs.
Post-Trail Cleaning and Undercarriage Washing
Start by removing obvious dirt and mud with a pressure washer, focusing on suspension components, the driveshaft, and areas where mud packs in tight.
Don't blast grease fittings or seals with high pressure, use a lower setting or a standard hose there, since aggressive pressure can force water past seals.
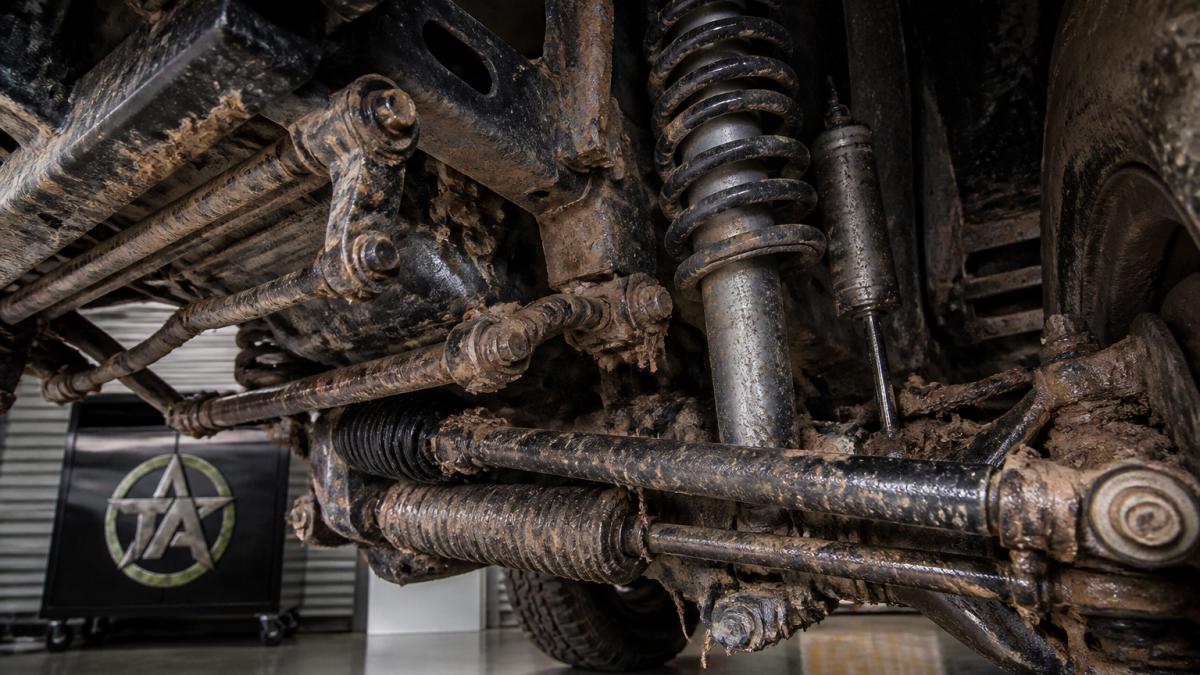
Off-Road Suspension Inspection: What to Check
Work front to back and top to bottom so you don't miss a component because you got distracted by the obvious mud-caked one. Record a pass or fail for each item so you can compare against the next trip.
Inspect on a level surface with the truck parked, engine off, parking brake set, and wheels chocked. Wear eye protection, and never put any part of your body under a truck supported only by a jack, use rated jack stands on solid ground.
Step 1: Shocks and Struts
- Body condition (pass/fail): Look for dents, deep gouges, cracked mounts, or a bent shaft. A lightly scuffed body is usually cosmetic; a bent shaft, cracked eyelet, or crushed reservoir is a fail.
- Leaks (pass/fail): A light film of oil around the shaft seal is common and often normal. Active dripping, a wet streak running down the body, or oil pooled on the mount is a fail, the seal is gone.
- Mounts and bushings (pass/fail): Grab the shock and try to move it. Any side-to-side play, clunk, or visible gap at the upper or lower mount is a fail.
On coilovers, check the coil spring for cracks, rust pitting, and contact marks where coils may have bound. On remote-reservoir shocks, inspect the hose and fittings for chafing and leaks.
Step 2: Suspension Joints, Bushings, and Mounts
Bushings are rubber or polyurethane sleeves that cushion metal-to-metal contact. They wear quickly on rough terrain.
- Bushings (pass/fail): Look for cracks, tears, missing chunks, or separation from the metal sleeve. A cracked bushing loses its cushioning and lets parts move too freely. Polyurethane bushings often squeak when dry, a lubrication issue, not necessarily a failure.
- Ball joints (pass/fail): With the front end safely supported, grab the tire at top and bottom and rock it. Excessive in-and-out play, a clunk, or a torn boot is a fail. Some ball joints have a wear indicator; check your service manual for how yours is checked.
- Control arm bushings and pivots (pass/fail): Look for shifted or extruded rubber, elongated bolt holes, or fresh shiny metal where a part has been moving against something it should not.
Step 3: Steering Linkage and Related Components
The steering linkage connects your steering wheel to the wheels, tie rods, drag links, and steering dampers. Rough terrain can bend or damage these components.
- Tie rod ends and drag link (pass/fail): Grab each and try to move it. Any play, clicking, or torn boot is a fail. Even a small bend changes toe and steering response.
- Steering damper, if equipped (pass/fail): Look for leaks and a bent shaft. A failed damper makes steering feel loose and unstable, especially with oversized tires.
- Pitman and idler arms (pass/fail): Check for play at the frame and steering box ends. Play here shows up as vague steering and wander.
Step 4: Springs, Leaf Packs, and Lift Components
- Coil springs: Look for cracks, heavy rust pitting, and contact marks between coils.
- Leaf springs: Check for cracked or broken leaves, a reversed (worn-flat) main leaf, and loose or missing U-bolt nuts. Look at the shackle and its bushings for play.
- Lift kit components: On lifted trucks, inspect drop brackets, extended brake lines, sway bar end links, and any spacer or block for cracks, loose hardware, and contact with other parts. Check that brake lines and ABS wiring have slack through full suspension travel.
Step 5: Driveline and Related Components
- U-joints and CV joints (pass/fail): Look for rust-colored dust around the caps (a sign of a dry or failing U-joint), torn CV boots, and grease slung onto nearby surfaces.
- Driveshaft: Check for dents, missing balance weights, and fresh scrape marks. A dented driveshaft can vibrate and eventually fail.
- Differential and transfer case: Look for leaks at the pinion seal, cover, and output seals.
Step 6: Tires and Wheels
- Tires (pass/fail): Check for cuts, chunking, sidewall bubbles, embedded rocks, and uneven wear. Uneven wear across the tread often points to an alignment or inflation problem.
- Wheels (pass/fail): Look for bent rims, cracked beads, missing lug nuts, and rock rings or beadlock hardware that has loosened.
- Pressure: Reset to the pressure recommended for street driving. Trail pressures are usually too low for highway speeds.
What to Do With the Results
Anything marked fail that affects steering, braking, or wheel retention means the truck shouldn't be driven until repaired. Worn-but-not-failed items should be serviced before the next trail run. If you're unsure whether a component is within spec, have a qualified shop inspect it.
How to Lubricate Truck Suspension Components
Lubrication is where well-meaning owners do damage. The goal is to push fresh grease through a joint and displace old grease, water, and grit, not to fill the joint until it bulges. Knowing which parts take grease and how much is enough separates a routine that extends component life from one that shortens it.
First: Know What Is Greaseable on Your Truck
Not every truck has grease fittings, and not every fitting is on the same component. Many modern trucks ship with sealed ball joints, tie rod ends, and U-joints with no zerk at all; others mix greaseable aftermarket parts with sealed factory parts. Check your truck and service manual before grabbing a grease gun.
Common greaseable locations, when equipped:
- Ball joints on control arms (some aftermarket units)
- Tie rod ends (some aftermarket units)
- Drag link connections
What Should NOT Be Greased
- Sealed ball joints, tie rod ends, and U-joints: There is no fitting, and poking a needle through the boot to add grease forces contaminants in and destroys the seal. Leave them alone.
- Rubber bushings: Standard rubber bushings are designed to flex, not to be greased. Grease attacks rubber and attracts grit. If a rubber bushing is squeaking, the fix is usually replacement, not lubrication.
- Brake components, ABS sensors, and wiring: Keep grease away from these entirely.
Cleaning Before You Grease
Greasing a dirty fitting pushes grit into the joint. Before attaching the grease gun:
- Wash the undercarriage and let it dry completely.
- Wipe each fitting and the surrounding area with a clean rag.
- If a fitting is caked with dried mud, clean it with a small brush and a little penetrating oil, then wipe it dry.
- Inspect the fitting itself. A broken or missing zerk should be replaced before greasing, otherwise you are pumping grease onto the ground.
Greasing Procedure
- Use the right grease. A quality lithium-complex or moly-fortified chassis grease rated for chassis and suspension use is a common choice. Moly-fortified grease is often recommended for high-load joints like ball joints and U-joints. Check your service manual or the component manufacturer for the recommended grease type.
- Attach the grease gun coupler firmly. A loose coupler leaks grease around the fitting instead of into the joint.
- Pump slowly. Add grease in short strokes, not one long blast. Watch the joint boot or seal.
- Stop when you see fresh grease. The moment clean grease appears at the boot lip or seal edge, stop. That means old grease and any trapped moisture have been displaced.
- Stop immediately if the boot swells or grease escapes elsewhere. A swelling boot means the grease has nowhere to go, the joint is full, or the boot is compromised. Continuing can rupture the boot and let water in.
- Wipe off excess grease. Grease left on the outside of a joint collects dirt and grit that will work its way into the seal.
How Much Is Enough
Over-greasing is a common mistake. Excess grease heats up, can push past seals, and can hydraulically load a boot until it tears. A few pumps per fitting is usually enough on a recently greased joint; a dry joint may take more, but stop the moment fresh grease appears.
Components Without Fittings
For parts that can't be greased, sealed joints, rubber bushings, and similar, don't try to lubricate them. Instead:
- Keep them clean and free of packed mud.
- Inspect them for cracks, tears, and play at every post-trail inspection.
- Replace them when they fail rather than trying to extend their life with spray lubricants, which can attract grit and degrade rubber.
A light silicone-based spray on rubber bushings can reduce squeaking in some cases, but check the label first, many petroleum-based sprays degrade rubber over time.
After Greasing
Take a short drive and listen. New noises after greasing usually mean an overfilled boot, a loose fitting, or a disturbed component. Recheck the joints you serviced and wipe up any slung grease.
Truck Suspension Damage Symptoms and When to Stop Driving
Some damage requires immediate attention. Know the signs your truck isn't safe to drive.
Stop driving immediately if you notice:
- Severe pulling to one side that doesn't improve with wheel alignment
- Clunking or banging sounds from the suspension during normal driving
- A wheel that visibly leans in or out at the top
These symptoms mean structural damage or component failure. Driving further risks loss of control.
Schedule service soon if you notice:
- Slight pulling to one side
- Clicking or creaking sounds when turning
- Uneven tire wear
These won't cause immediate failure, but they'll get worse. Address them before your next trail run.
Off-Road Truck Maintenance Checklist and Inspection Intervals
Base your routine on how hard you use your truck, light weekend trails need less frequent inspection than serious off-roading.
| Maintenance Task | After Light Trail | After Aggressive Off-Road | Monthly (if off-roading weekly) |
|---|---|---|---|
| Wash undercarriage and suspension | Yes | Yes | Yes |
| Inspect shocks for leaks | Yes | Yes | Yes |
| Check bushing condition | Yes | Yes | Yes |
| Inspect steering linkage | Yes | Yes | Yes |
| Lubricate grease fittings | Yes | Yes | Yes |
| Retorque suspension fasteners | No | Yes | Yes |
| Check tire pressure and condition | Yes | Yes | Yes |
| Inspect driveshaft U-joints | No | Yes | Every 3 months |
Use this checklist after every trail run and keep notes. Over time, patterns emerge that help you spot developing problems.
Retorquing Suspension Fasteners Safely
Off-roading creates vibration that loosens bolts. Retorquing suspension fasteners restores safety and stability.
First, identify all suspension fasteners. These include:
- Shock mounting bolts (top and bottom)
- Control arm bolts
- Sway bar link bolts
Use a torque wrench to tighten each bolt to spec.
Don't guess at torque specs. Under-tightening leaves bolts loose. Over-tightening can strip threads or crack components.
Retorque fasteners after your first few miles of driving post-repair. Bolts can settle and loosen slightly as components move into final position.
Truck Army Tech Tip
Keep a maintenance log for your truck. Note the date, trail conditions, terrain difficulty, and any issues you find. Over time, this log shows patterns and helps you predict what needs attention before the next trip. A simple notebook in your truck works fine. When you're ready to upgrade your suspension or add protection for serious off-roading, Truck Army carries a full range of suspension and leveling kits built for trucks that see real terrain.
Frequently Asked Questions
What should I inspect on my truck after off-roading?
After a trail run, inspect shocks and struts for leaks or damage, check all suspension joints and bushings for wear, examine steering linkage components, look for bent or cracked fasteners, and examine tires for punctures or sidewall damage. Check the undercarriage for debris lodged against skid plates or brake lines. If you notice fluid leaks, unusual clunking sounds, or visible cracks in any suspension part, address them before driving normally. A complete inspection takes 30-45 minutes and can prevent costly damage.
How do I know if my truck suspension was damaged off-road?
Signs of suspension damage include clunking or creaking noises when turning or going over bumps, uneven tire wear, a pulling sensation to one side, difficulty steering, or a noticeably rougher ride. Fluid leaks from shocks indicate internal damage. Visible bending, cracking, or separation of mounts, bushings, or control arms means immediate repair is needed. If you hit a rock hard, bottomed out repeatedly, or felt a sharp impact, inspect that area closely. When in doubt, have a shop perform a suspension alignment check.
How often should I check suspension components after trail driving?
After each off-road trip, perform a visual inspection and undercarriage wash within 24 hours. For moderate trails, inspect again after every 3-4 trips. For aggressive terrain (rocks, water crossings, steep descents), inspect after every trip. Check suspension fasteners for looseness monthly if you trail regularly. Lubricate greaseable joints every 500-1000 miles or after muddy conditions. Stock suspension typically needs professional inspection every 6 months if used off-road regularly; lifted or modified systems may need more frequent checks.
Can I maintain my truck suspension myself, or do I need a shop?
Basic maintenance like cleaning, visual inspection, lubrication, and fastener retorquing are DIY-friendly with hand tools and a torque wrench. You'll need a jack and jack stands to safely access components. Replacing shocks, struts, bushings, or control arms typically requires specialized tools and alignment work, tasks best left to a shop. If you're unsure about what you're looking at or find damage, have a professional inspect before attempting repairs. Many truck owners handle routine maintenance but outsource structural repairs.
Maintaining your truck's suspension after off-roading keeps it safe and ready for the next adventure. Regular cleaning, inspection, lubrication, and retorquing catch problems early and prevent expensive repairs. Take the time to do it right, and your truck will reward you with reliable performance trip after trip. When you're ready to upgrade your suspension system or add off-road protection, Truck Army has the suspension kits and accessories built for serious truck owners.